
Connect and communicate with customers in real-time! Live Chat is a premium seller account service that let’s you reply to customer inquiries as they come. Here’s an easy-to-follow tutorial to help you activate Live Chat on your LocalEats.ph store.
REMEMBER: As of this period, Live Chat is still in beta version and is currently free for all LocalEats.ph sellers to use until further notice.
Part 1: Configure and Connect Your Facebook page
1. Login to Facebook and go to your Facebook Page and click the Settings option.

2. Once you’re in the Page Settings, click the Messaging option. Find the “Add Messenger to your website” section and click the Get Started button.

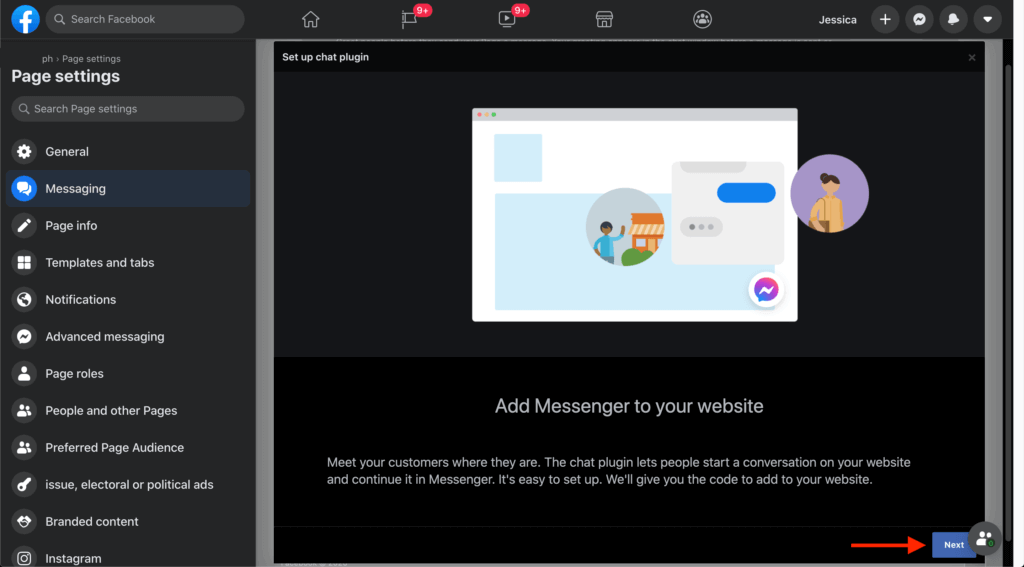
3. You will see the Set-up Chat Plugin popup, click Next.
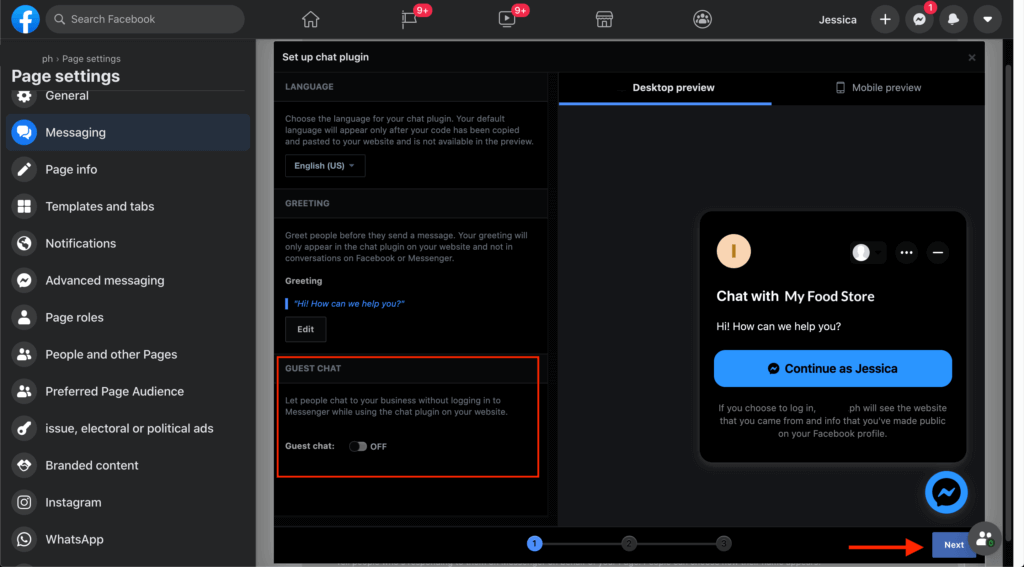
4. On this step, you can choose whether you want to allow GUEST CHAT or not. If you want to make sure that you will only receive messages from someone with a Facebook account, TURN OFF the Guest chat option. Then click Next.
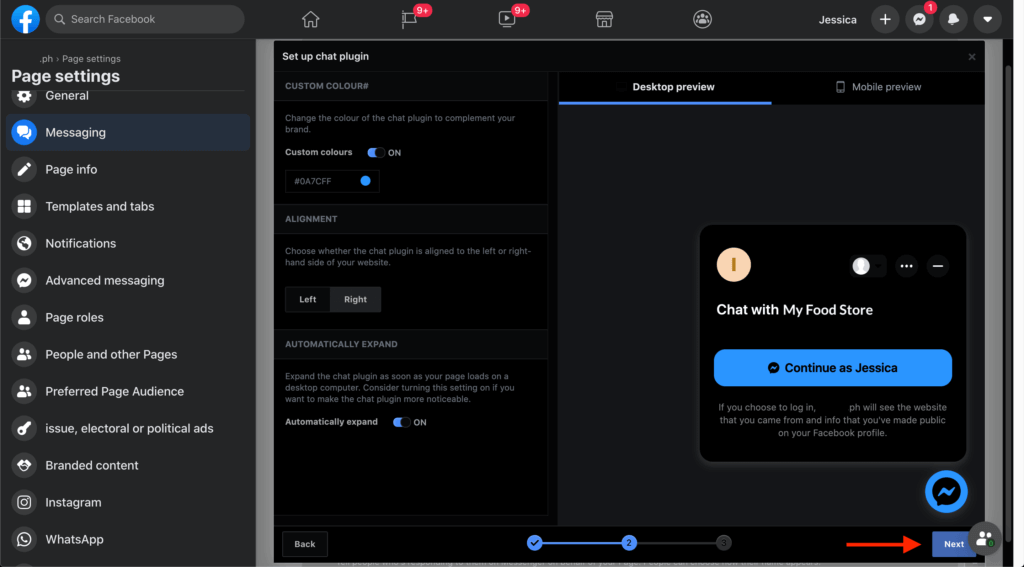
5. You can just skip this step and click Next.
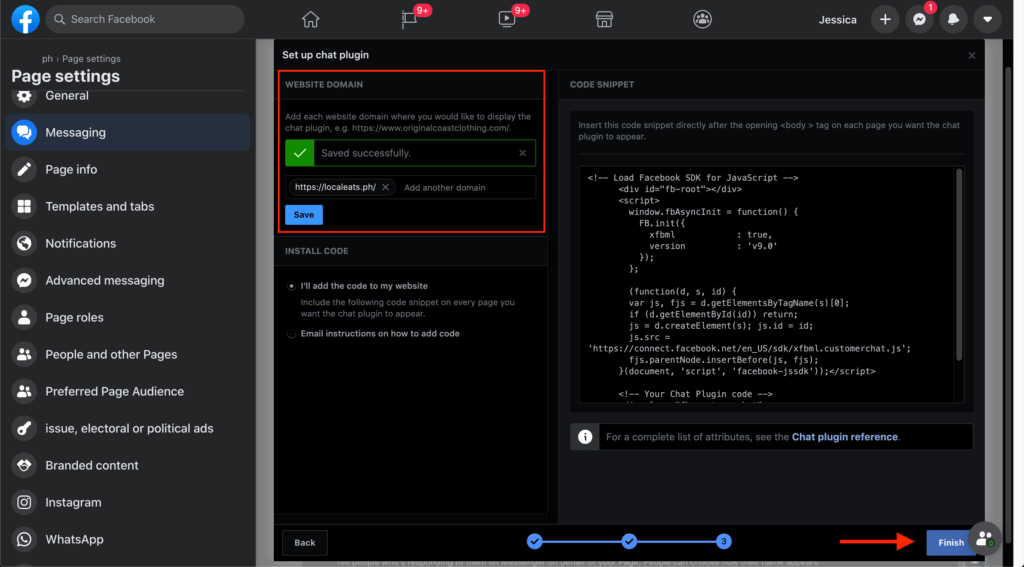
6. In the Website Domain, enter the url https://localeats.ph and click Save. This is to make sure that you allow LocalEats.ph website to connect to your Facebook Page Messenger. Then click Finish.
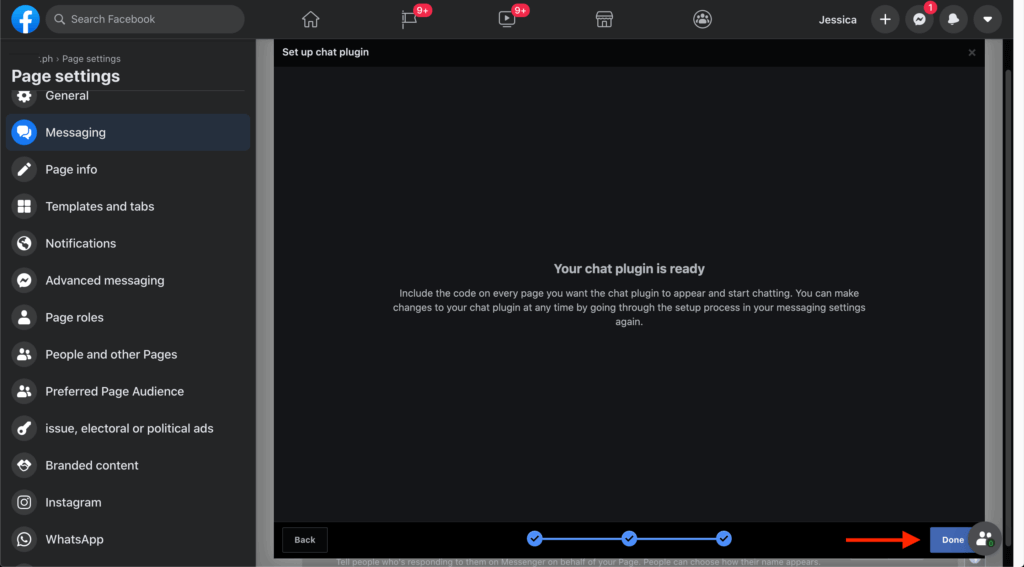
7. Your chat plugin is now ready. Click Done.
Part 2: Copy Your Facebook Page ID
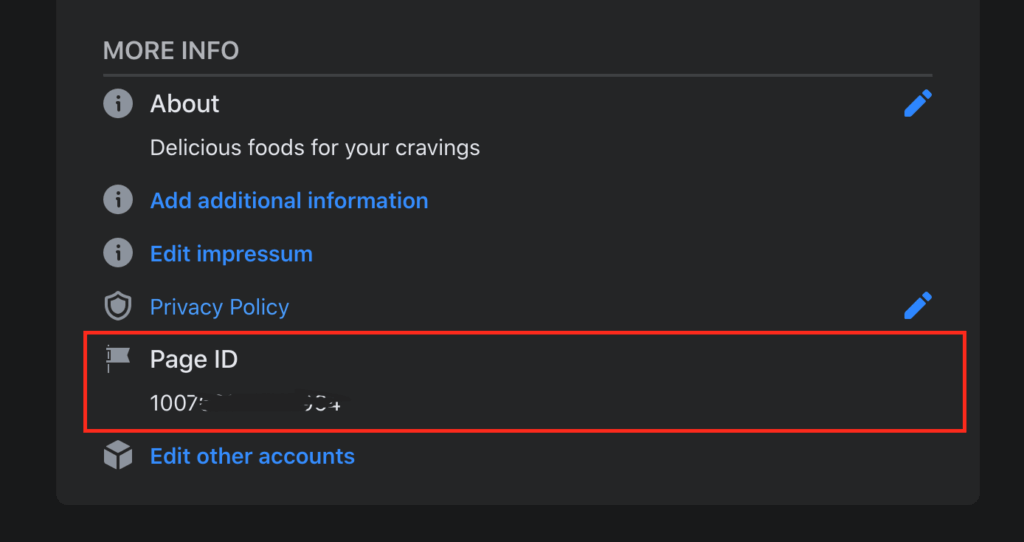
Go to your Facebook Page and click the About menu. Scroll down all the way to the bottom and you should see Page ID. Copy it and paste it in the Facebook Page ID field in your Store Settings in LocalEats.ph.
Part 3: Enable Live Chat on your LocalEats.ph Store Settings
1. Login to your LocalEats.ph account and go to Store Settings.
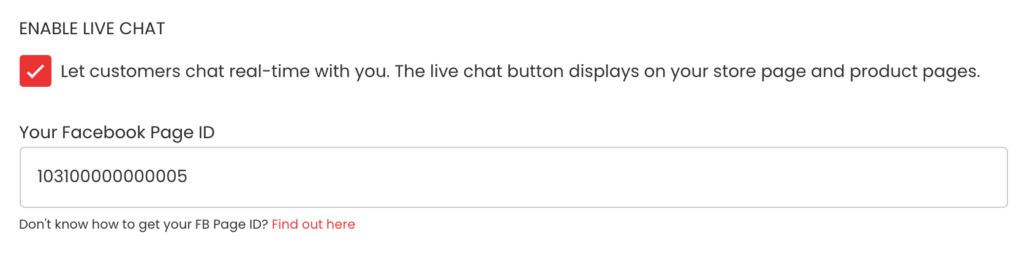
2. Scroll down and find the Enable Live Chat. Select the checkbox and enter your Facebook Page ID.
3. Click the UPDATE STORE SETTINGS button to save.
And it’s done! The Chat Seller button will now appear on your store page as well as to your product pages. Customers can now chat real-time with you!


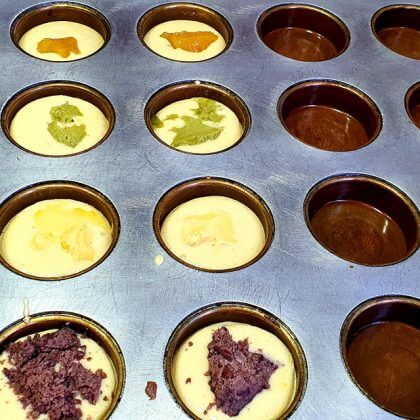 Box of 12 Assorted All-Time Favorites
  Prawns in Garlic & Olive Oil
 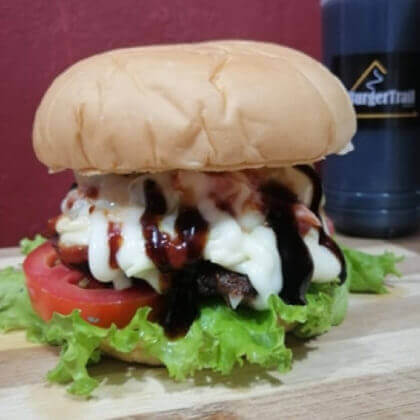 Newbie Burger